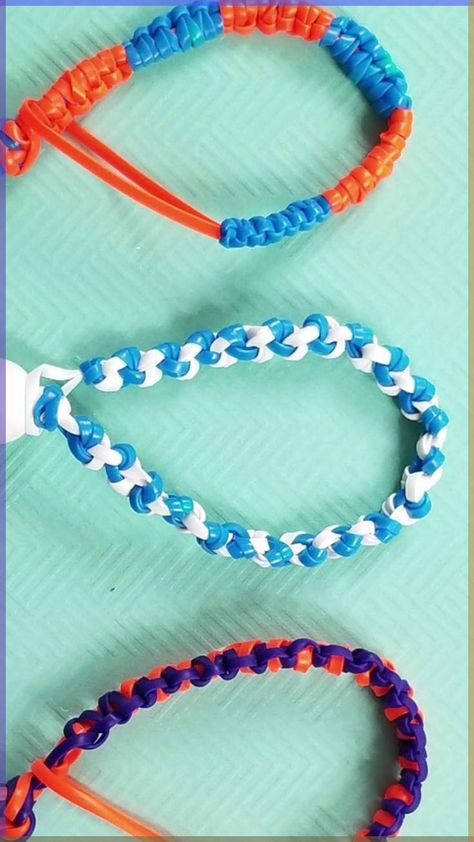
Making a lanyard is a fun and practical craft project. Here’s a step-by-step guide to create a basic lanyard using the box stitch technique:
Materials needed:
- Lanyard string or paracord (two colors)
- Scissors
- Lighter (optional, for sealing ends)
- Lanyard hook or key ring
Steps:
- Prepare the strings:
- Cut two pieces of lanyard string, each about 1 yard long.
- If using different colors, we’ll call them Color A and Color B.
- Create the starting loop:
- Fold both strings in half.
- Place Color A horizontally, with the loop on the left.
- Place Color B vertically, with the loop at the top.
- Pull the ends of Color B through the loop of Color A.
- Pull tight to create a knot at the center.
- Begin the box stitch:
- Take the left strand of Color A and create a ‘4’ shape over the center strands.
- Take the right strand of Color A and pass it under the center strands and up through the loop of the ‘4’.
- Pull tight to create your first knot.
- Continue the pattern:
- Repeat step 3, alternating colors each time.
- Color B will now be horizontal, creating a ‘4’ shape.
- Color A will pass under and through the loop.
- Maintain tension:
- Keep the knots tight and uniform as you work.
- The lanyard will naturally twist as you progress.
- Check length:
- Continue the box stitch until the lanyard reaches your desired length.
- Finish the lanyard:
- When you reach the desired length, cut the remaining cord, leaving about an inch.
- (Optional) Use a lighter to carefully melt the ends to prevent fraying.
- Attach hardware:
- Thread the lanyard through a key ring or lanyard hook.
- You can create a loop and tie it off, or use the remaining cord to create a final knot around the hardware.
- Final touches:
- Trim any excess cord.
- Adjust knots if necessary for a uniform appearance.
With practice, you’ll be able to create more complex patterns and designs. Lanyards make great personalized gifts or practical accessories for keys, ID badges, or small tools. Enjoy your handmade lanyard!