Education
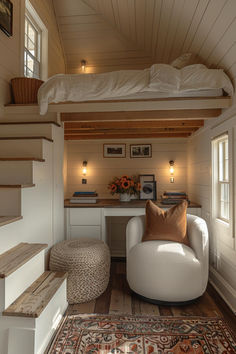
Frame and Finish a Sleeping Loft
Creating a sleeping loft can maximize space in small homes or add a cozy retreat to larger ones. Here’s a guide to framing and finishing a basic sleeping loft:
Framing:
- Plan and measure: Determine the loft’s size and location, ensuring adequate headroom below and above.
- Install support beams: Secure strong beams to the walls and/or ceiling joists to bear the loft’s weight.
- Build the frame: Use 2×4 or 2×6 lumber to create a sturdy frame, including joists spaced 16″ apart.
- Add flooring: Install plywood sheeting over the joists for a solid floor.
- Build railings: Ensure safety with sturdy railings at least 36″ high.
Finishing:
- Insulation: If needed, add insulation between floor joists for sound dampening and temperature control.
- Electrical: Install any necessary wiring for lighting or outlets before closing up the space.
- Drywall: Cover the underside of the loft and any visible framing with drywall for a polished look.
- Stairs or ladder: Install a secure means of access, whether a space-saving ladder or compact staircase.
- Flooring: Choose comfortable, durable flooring like carpet or hardwood for the loft surface.
- Paint and decorate: Finish with paint, add lighting, and personalize the space to your taste.
Remember to check local building codes and possibly obtain permits before starting your project. Consider consulting a professional for complex designs or if you’re unsure about structural integrity.


